This post may contain affiliate links. Please read our disclosure policy.
How to make Instant Pot yogurt with easy steps and pro tips! Customize tanginess, strain for Greek yogurt style, and get perfect results every time.

Want to Save This Recipe?
Enter your email & I'll send it to your inbox. Plus, get great new recipes from me every week!
By submitting this form, you consent to receive emails from The Kitchen Girl.
Why you’ll love my Instant Pot yogurt recipe
- Easy and hands-off: The Instant Pot does all the work to make your delicious yogurt, even while you sleep.
- Budget-friendly: Making yogurt at home is cost-effective with readily available milk and a small amount of yogurt.
- Versatile: Use your homemade yogurt in various recipes, from breakfast bowls to savory dishes and desserts.
- Step-by-step photos: This blog post includes step-by-step photos and an extensive FAQ to help Instant Pot beginners and first-time yogurt makers find success every time.
Ingredients you’ll need
- 1 gallon of milk - This creates the yogurt base. Use any fat percentage to suit your preference. I personally love to use skim milk with a nonfat Greek yogurt starter, then I strain the finished yogurt, and it's perfectly creamy every time!
- ¼ cup plain yogurt with active cultures - This is the starter for your Instant Pot yogurt. Use any fat percentage. It's available at any grocery store, but if you have it on hand, that's perfect! Just make sure the container says live active cultures like Lactobacillus bulgaricus and Streptococcus thermophilus. It's fine if Lactobacillus acidophilus and Bifidobacterium bifidum are listed on the label.
How to make yogurt in your Instant Pot
Here's how to make Instant Pot yogurt step-by-step with photos! Please refer to the full recipe below for printable instructions.
Step 1. Sterilize the Instant Pot
Pressure cook 1 cup of water on HIGH for 1 minute. Release the pressure, discard the water, and cool the inner pot. Removing the silicone ring is optional, but I do it to prevent odor transfer to the yogurt, especially if I'm overdue to replace it.

Step 2. Heat the milk
Place the inner pot in the Instant Pot, add the milk, close the lid, and select "Yogurt." Press "Adjust" until it reads "Boil." Allow up to 1 hour for 1 gallon of milk. When the cycle finishes, it will beep and change from "Boil" to "Yogurt." Use a thermometer to check if the milk has reached 180°F. If not, repeat the "Boil" process in 5-minute increments until it does.


Step 3. Cool the milk
Remove the inner pot of milk from the Instant Pot. Cool the milk to 110°F-115°F by leaving it at room temperature for 50-60 minutes or in an ice bath for 15 minutes. The final temperature range is crucial for yogurt success.
Step 4. Make the yogurt starter
Remove any skin from the milk surface. Ladle ½ cup of the milk into a small bowl. Add the yogurt to the bowl, whisk to combine, pour this mixture into the Instant Pot, and whisk to combine. This tempers the yogurt culture, which prevents overheating and ensures proper incubation.


Step 5. Incubate the yogurt
Place the inner pot in the Instant Pot, close the lid, and press the "Yogurt" button followed by the "Adjust" button to select either of the preset times: 8 hours for less tangy yogurt or 24 hours for more tangy yogurt. You can adjust the time using the "+" and "-" buttons. Through testing, I've found that 6 hours creates a mild, less tart yogurt. When the cycle finishes, the pot will beep, and the display will show "Yogt."


Step 6. Test the yogurt
When the timer ends and the display reads "Yogt," open the lid and check the yogurt's thickness. If it’s not thick enough to hold a spoon upright, repeat the incubation step in 1-hour increments until it reaches your desired consistency.
Step 7. Transfer and storage
Transfer the yogurt to an airtight container and refrigerate for up to 7 days or freeze for up to 30 days. Here's how to make your yogurt thicker step-by-step.
How to strain yogurt
If you're like me, you love a classic Greek yogurt for its thick and creamy texture. To thicken your Instant Pot yogurt, strain it for up to 2 hours to separate the whey. Do this with a dedicated yogurt strainer, or copy my favorite DIY hack with a nut milk bag over a 4-quart Cambro.


If your yogurt becomes too thick and lumpy from straining, transfer it to a bowl and whisk in small amounts of whey to adjust the consistency.

Recipe tips
These are my quick tips for common questions about making Instant Pot yogurt. Please refer to the FAQ section below for more detailed questions and answers.
- Instant Pot Size: The 6-quart Instant Pot is ideal for this recipe, accommodating up to 1 gallon of milk and yielding 16 cups of yogurt. For larger batches, opt for an 8 or 10-quart Instant Pot.
- Recipe yield: You can cut this recipe in half and follow the same instructions.
- Use the Instant Pot lid: A random lid won't work. The Instant Pot lid is necessary for making yogurt because it triggers the "Yogurt" function on the cooker.
- Milk and Yogurt Options: Use any fat percentage for milk and yogurt. I prefer 1% milk and Greek nonfat yogurt. This recipe is not suited to make plant-based yogurt.
- Yogurt starter: Use plain yogurt with live active cultures. If using frozen yogurt as a starter, ensure it’s fully thawed before use.
- Incubation and flavor: The longer the yogurt incubates, the more tart it will become. 6 hours is the minimum time frame to incubate yogurt.
- Whey: Any whey strained from the yogurt can be used in recipes as a substitute for water or milk.
Troubleshooting tips
- What if my milk doesn’t reach 180°F? If this happens, bacteria may remain, affecting the quality of the yogurt. Continue using the 'Boil' cycle until it reaches 180°F.
- What if my yogurt doesn't set after incubation? If your yogurt doesn’t set, re-incubate for 30 minutes to 2 hours. If that doesn't work, your starter culture may not be optimally fresh and active.
- Why does my yogurt have a grainy texture? This can happen if the starter doesn’t have enough live active cultures. For best results, use fresh, plain yogurt with live cultures.
- Why is my yogurt extra tangy? The longer yogurt incubates, the tangier it becomes. Always aim for a 6-hour incubation, taste the yogurt, and incubate longer for a more tangy yogurt flavor.
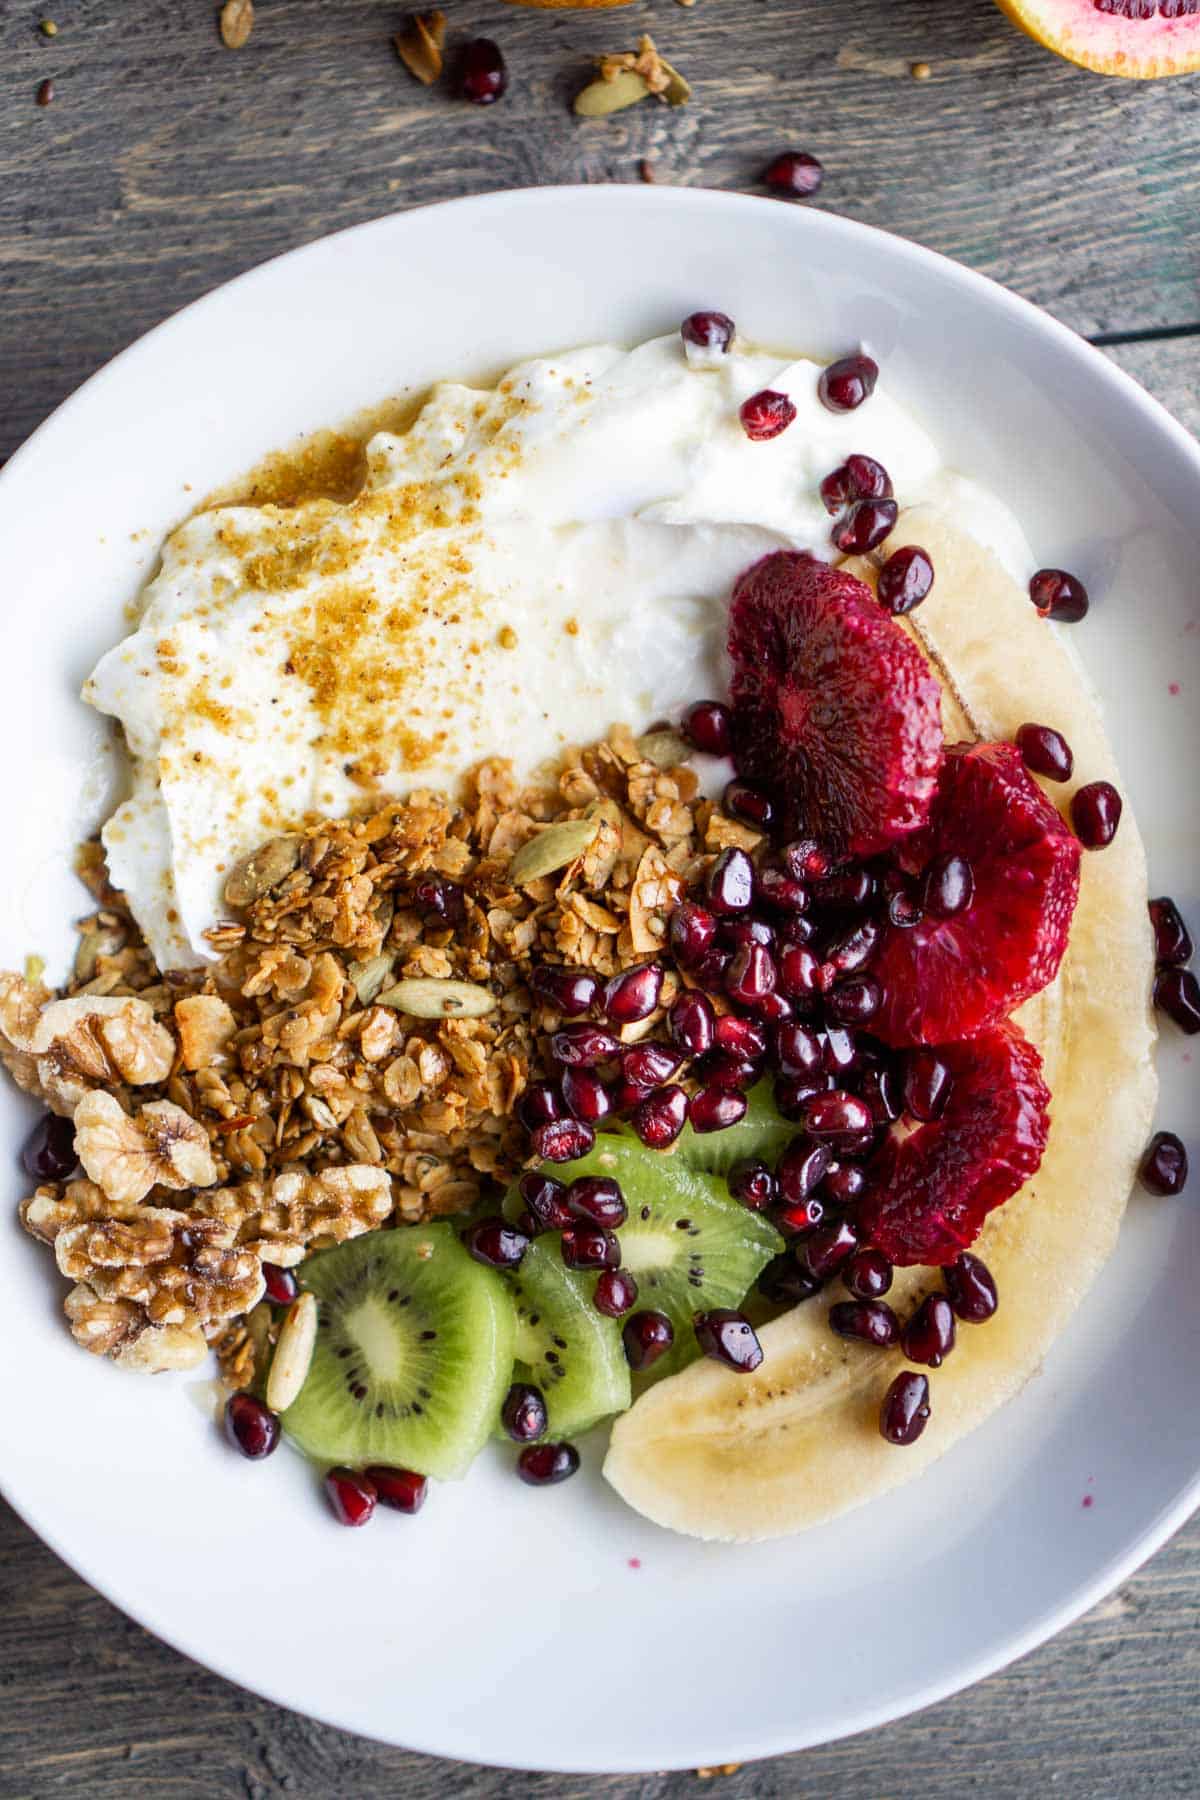
Serving Ideas for Homemade Yogurt
- Dip for Veggies: Serve my Greek yogurt French onion dip with fresh vegetables for a light snack.
- Parfaits: Layer yogurt with granola, fresh fruit, and a drizzle of honey for a delicious breakfast or snack.
- Smoothies: Add a scoop of yogurt to boost the protein in my peach smoothie.
- Make a refreshing sauce: Mix homemade yogurt with cucumber, garlic, lemon juice, and dill for a refreshing tzatziki cucumber sauce.
- Salad Dressing: Whisk yogurt with lemon juice, herbs, and olive oil for a creamy Mediterranean salad dressing, green goddess dressing, or my creamy Greek yogurt Ranch!
- Frozen Yogurt: Use your fresh homemade yogurt for my strawberry frozen yogurt recipe.
- Baking Substitute: You can use yogurt in place of milk in my one-bowl banana bread recipe for a hint of tangy flavor.
- Top Pancakes or Waffles: Scoop yogurt over chocolate pancakes, waffles, or French toast, with a sprinkle of cinnamon or fresh berries.
- Marinade: Combine yogurt with spices and use it as a marinade for Greek chicken thighs or lamb, adding tenderness and flavor.


More Instant Pot recipes for meal prep
- Instant Pot Brown Rice
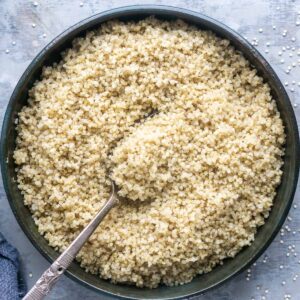
- Instant Pot Quinoa
- How to Proof Bread Dough in an Instant Pot
- Instant Pot Hard Boiled Eggs
- Instant Pot Chickpeas
- Instant Pot Sweet Potatoes
📖 Recipe

Instant Pot Yogurt Recipe
Want to Save This Recipe?
Enter your email & I'll send it to your inbox. Plus, get great new recipes from me every week!
By submitting this form, you consent to receive emails from The Kitchen Girl.
Note about scaling
When scaling, the light gray ingredient notes after the comma don’t change. Adjust as needed.
Ingredients
ℹ️ Yields 16 cups yogurt, or 8 cups Greek-style yogurt + 8 cups whey when fully strained.
- 1 gallon Milk, any fat percentage
- ¼ cup Plain Yogurt with active cultures
Instructions
- (Optional) Sterilize the Instant Pot (Takes 15 minutes)Pressure cook 1 cup of water on HIGH for 1 minute. Release the pressure, discard the water, and cool the inner pot.
- Heat the milk (Takes 30-60 minutes)Add MILK to the Instant Pot. Use the Instant Pot lid (valve set to Venting) or any well-fitting lid. Press Yogurt, then select Adjust until the display reads Boil. This heats the milk to 180°F, an essential temperature for yogurt success. When the display reads Yogt, check the temperature with a thermometer. If it didn’t reach 180°F, repeat the Boil cycle in 5-minute intervals until it does.
- Cool the milk (Takes up to 60 minutes)Use oven mitts to transfer the inner pot of MILK out of the Instant Pot base. Cool the MILK to 110°F–115°F at room temp (50–60 min) or in an ice bath (about 15 min). Check with a thermometer—this temperature range is essential for yogurt success.
- Temper the yogurt culture (Takes 5 minutes)Remove any surface skin from the milk. Whisk ½ cup warm MILK with the YOGURT in a small bowl, then whisk this mixture back into the Instant Pot.
- Incubate the yogurt (Takes minimum 6 hours up to 24 hours)Place the inner pot in the Instant Pot with the same lid. Press Yogurt, then Adjust to select a preset time: 8 hours for less tangy yogurt or 24 hours for more tangy yogurt. Use the + and – buttons to adjust the time. I prefer to only incubate for 6 hours as it yields a mild, less tart yogurt. When the cycle finishes, the pot will beep and the display will read Yogt.
- Test the yogurt (Takes 5 minutes)When the timer ends and the display reads YOGT, open the lid and check the thickness. If you can stand a long spoon upright in the yogurt, it's ready. If not, continue incubating in 1-hour intervals until it reaches your desired texture and tang.
- StorageTransfer the yogurt to an airtight container and refrigerate for up to 7 days.
- (Optional) Strain for Greek-style yogurtFor thicker Greek yogurt, strain it for 2 hours (or overnight) using your preferred straining method. If it becomes too thick, whisk in a bit of whey to loosen.
Recipe Notes
Equipment
- 6-quart Instant Pot *see recipe note about size
- small mixing bowl
- ladle or large spoon
- yogurt strainer or nut milk bag with a 4-quart container optional, for straining yogurt
Nutrition
Nutrition facts are estimates and may vary based on brands, ingredients, and portions.
Frequently asked questions
The 'Yogurt' setting allows you to boil the milk and incubate it at a controlled temperature, which is essential for making yogurt.
You need the Instant Pot lid because it triggers the Yogurt function on the Instant Pot.
Boiling the milk kills harmful bacteria, ensuring a safe environment for the yogurt cultures to thrive.
It's a protein layer that forms during the boiling process and should be removed before incubation.
It’s best to use plain yogurt with live active cultures. Flavored yogurts can contain sugars or additives that may affect the yogurt-making process.
It’s best to add fruit, sweeteners, or flavors after incubation. Adding flavors before incubation can affect the consistency of the yogurt.
Straining yogurt to remove excess whey, which naturally makes yogurt thicker. This is the process used to make Greek yogurt.
Whey is about 20-50% of the yogurt’s volume, depending on how long you strain it. For example, 1 quart of yogurt might yield 1-2 cups of whey and 2-3 cups of thicker yogurt.
Sweeten your yogurt after incubation by stirring in honey, maple syrup, fresh or frozen fruit, or other preferred sweeteners.


Lizzie says
Great recipe! Could understand all the steps easily. Made a delicious yogurt! Thank you!
Traci says
I'm so glad to hear it, Lizzie! I love this feedback because I always aim for easy instructions. Thanks for taking the time to share this 🙂 Enjoy!!
Mary Chevalier says
Thanks for the info you set my mind at rest. I am also going to give your French Bread a try
Traci says
Yay! I'm glad to hear it. Let me know if you have any questions about either recipe. I'm here for it. Hope you enjoy! xoxo
Mary Chevalier says
I have the 6 quart Instant Pot with the yogurt setting. I am a bit confused. Do you close the pressure valve or leave it open? I have not used the pot much. I was taught you had to leave the lining in the lid for it to work. I would like to give the Yogurt a try as it is something i use quite often.
Traci says
Hi Mary, happy to help! When using the yogurt setting, the pressure valve position doesn’t matter since it’s not a pressure cooking process. The same applies to the lid sealing ring. You don’t need it for the yogurt function. However, if you choose to do the optional sterilization step I included, that does require pressure cooking, so you’ll need to close the pressure valve and use the sealing ring. That step is optional, and you can sterilize separately if you prefer. Hope this helps, and I’m excited for you to give homemade yogurt a try! xoxo
JB says
Excellent tutorial for Instant Pot yogurt! You make it easy to understand. I love the photo steps (super helpful) and even the troubleshooting section. This will be my go-to IP yogurt recipe from now on. 10/10 recommend!
Traci says
I'm so glad you love this process and recipe as much as I do!! It's such a money-saver to make yogurt in the Instant Pot–and so easy! Thanks for your feedback! xoxo