This post may contain affiliate links. Please read our disclosure policy.
Proofing Dough in the Instant Pot creates the perfect, enclosed environment for yeast dough to ferment at a consistent temperature. This builds the gluten structure, makes dough more pliable, and results in optimal texture of baked goods. Perfect for Instant Pot beginners too!
Note: this article focuses on proofing yeast dough, not sourdough. We'll tackle that in another article.
Want to Save This Recipe?
Enter your email & I'll send it to your inbox. Plus, get great new recipes from me every week!
By submitting this form, you consent to receive emails from The Kitchen Girl.
What does proofing dough mean
Proofing dough, aka proofing bread, is a necessary step in developing the structure and flavor of yeast dough. Proofing requires dough to rest in a warm, humid environment where the yeast ferments the dough, causing it to expand. This helps develop the fluffy, chewy texture and comforting flavor we love about freshly baked bread and other baked goods.

Why proof bread in an Instant Pot
The Instant Pot creates the ideal environment for proofing. Here's how. When you proof yeast dough at an average room temp of 72°F, it can easily take a few hours to properly proof. The pressure cooker "yogurt" setting, intended for incubating yogurt, provides a steady temperature around 90°F. This proofs dough more efficiently, causing it to double in size in only 45 minutes!
Instant Pot proofing is also convenient because you can set it, walk away, and know that's it's doing its job, even in a chilly or drafty environment. Ultimately, the Instant Pot expedites the proofing process, allowing us to enjoy our baked goods sooner.
What recipes can be proofed in the Instant Pot?
You'll love how soft, warm, and fluffy your dough gets when it's proofed in the Instant Pot.
Any yeasted dough can be proofed in the Instant Pot. I always use mine for this French bread recipe or cranberry walnut bread recipe, cinnamon rolls, dinner rolls, croissants, pizza dough, foccaccia, and donuts, to name a few.
After the dough is mixed and kneaded, it goes into the Instant Pot for flawless proofing. As mentioned earlier, this helps baked goods become fluffy, tender, and more flavorful.
Materials needed
- Pressure cooker - This recipe will require a pressure cooker with a yogurt setting.
- Prepared bread dough - The Instant Pot can proof any yeasted bread or pizza dough.
- Olive oil - prevents dough from sticking to the pot (parchment works too!)
- Pastry brush - Use this to apply oil to the pot (paper towel works, too).
- Lid - rest any lid or plate on top of the pot during proofing. It should NOT be airtight.

How to proof dough in the Instant Pot
Step 1: Brush a light coating of OLIVE OIL inside the Instant Pot (or line with parchment paper).
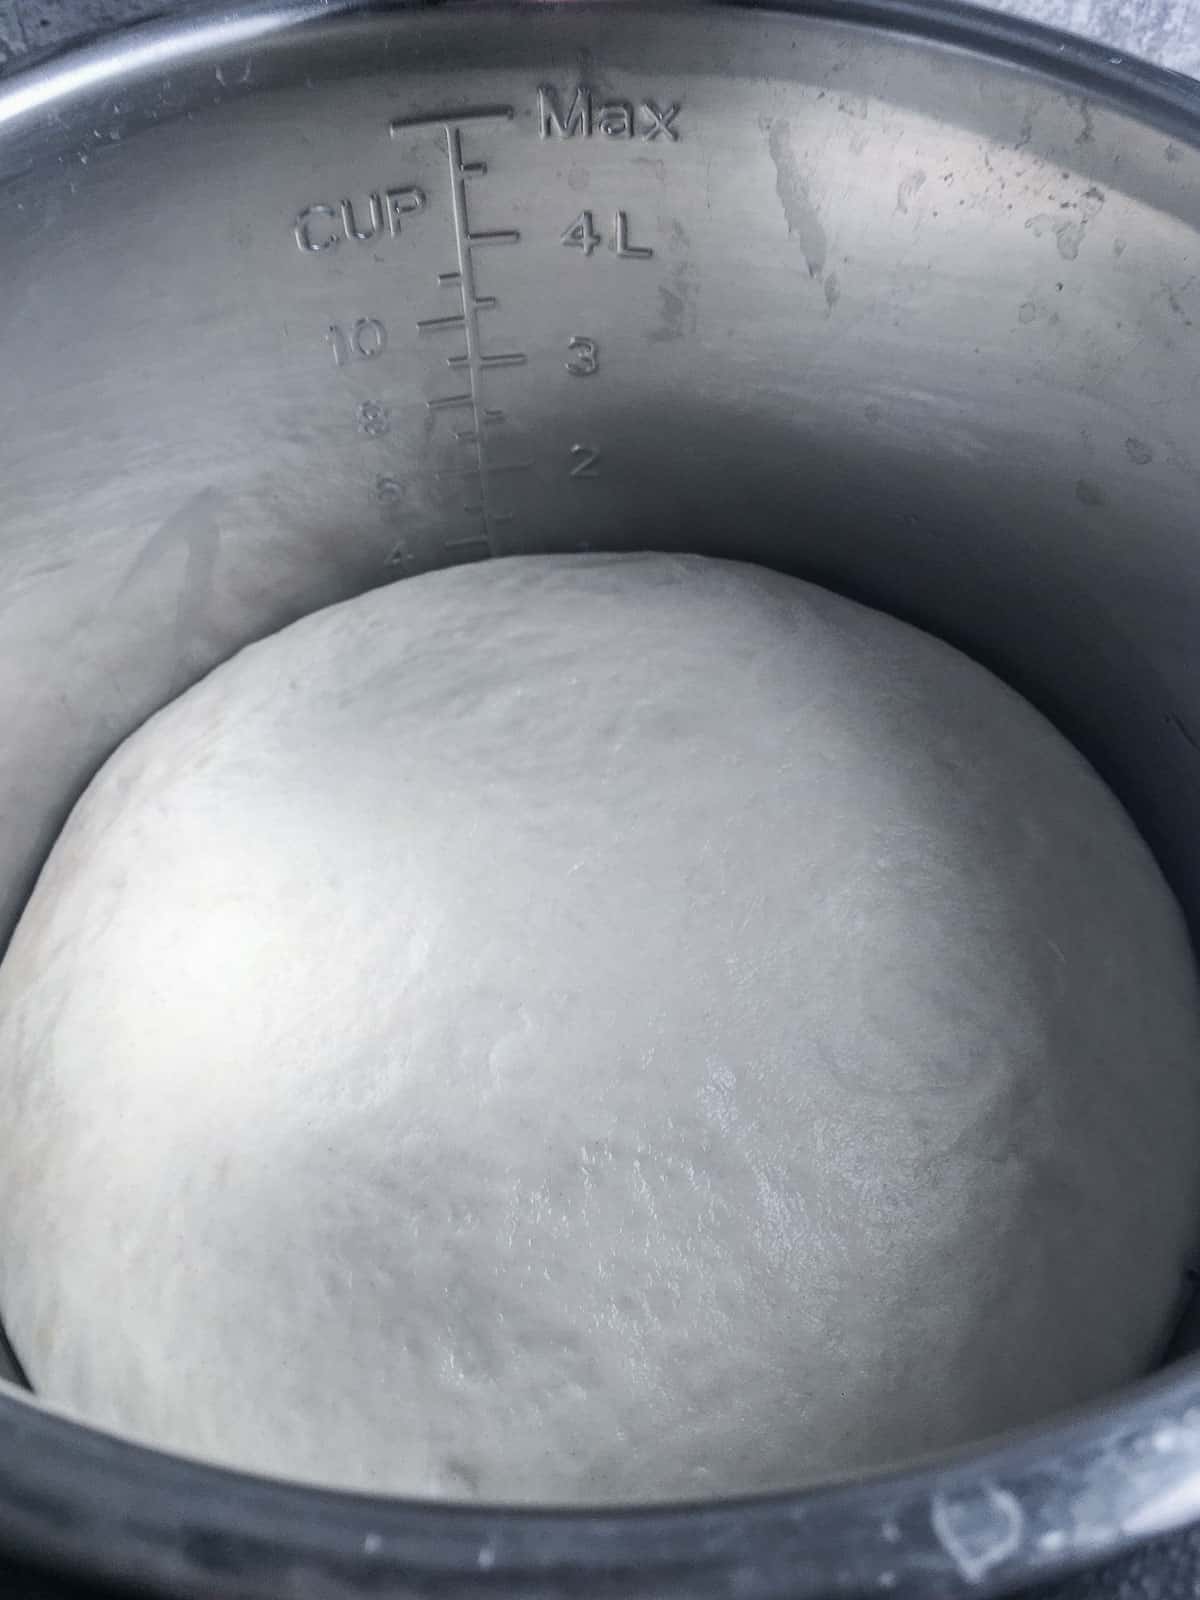
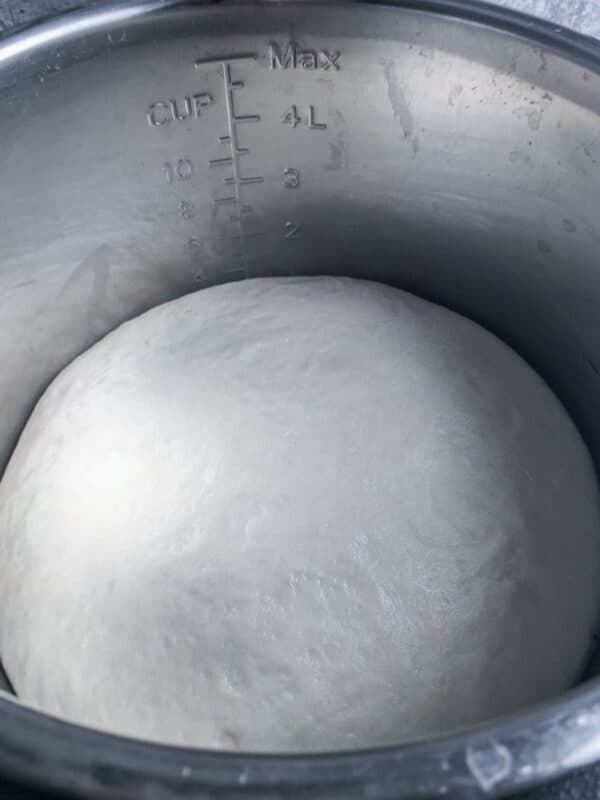
Step 2: Place dough in the pot and flip it around enough to pick up oil from the pot. Rest the dough seam side down, tucking the sides under to tighten it into a firm ball.

Step 3: Rest any lid on top of the pot. Do not create an tight seal because air needs to escape.
Step 4: Select “Yogurt” button and toggle the "Adjust" button to the "Less" setting and allow dough to double in size (30-45 minutes).
Note: The display timer defaults to 24:00 hours. Adjusting is optional and is done with the "+ or -" buttons. I prefer to leave it alone and use a separate 45 minute reminder (for mobility).

Instant Pot proofing tips
oil substitute - You can use parchment paper to line the pot if you prefer to not use oil during proofing.
using the yogurt setting - Toggling the "Adjust" button to the LESS setting (recommended) creates the perfect temperature for proofing dough. The NORMAL setting may slightly overheat the dough and cause dry spots (not the end of the world). The MORE setting will cook your dough (not in a good way).
lid - any lid that rests on top of the pot works (pizza pan, glass lid, or plate). You can use the IP lid, but set the pressure valve to "Venting". Also, super large dough batches can stick to the lid during rising. My recipes are never large enough for this.
proofing size - Use the markings on the inside wall of your pot to tell if dough is proofed enough to have doubled in size.
Frequently asked questions
If your pressure cooker has a yogurt setting, you can proof bread dough in it. Look for the yogurt 'button' on the display panel.
As long as you have a pressure cooker with a setting that holds food at about 90°F, you can effectively proof dough in that cooker. Otherwise, you can use the "Keep warm" function for a few minutes to warm the pot, then shut it off and add the dough to the pot where it will benefit from the residual heat.
You need to rise the dough in the pot until it doubles in size. This process takes 30-45 minutes to proof simple yeast bread recipes such as soft French bread.
It depends. If the final bread shape and baking pan fits inside the pot, go for it! Typically though, the shape and size are too large to fit in the pot and require a different proofing method.
📖 Recipe

Proofing Dough in the Instant Pot
Want to Save This Recipe?
Enter your email & I'll send it to your inbox. Plus, get great new recipes from me every week!
By submitting this form, you consent to receive emails from The Kitchen Girl.
Note about scaling
When scaling, the light gray ingredient notes after the comma don’t change. Adjust as needed.
Ingredients
- Olive Oil (to coat surface), or parchment paper
- Bread Dough, * see recipe footnote about dough amount
Instructions
Note: This is NOT a pressure-cooking method and the Instant Pot locking lid is not required.
- Brush a light coating of OLIVE OIL inside the Instant Pot (or line with parchment paper).
- Place dough in the pot and roll it around to pick up oil from the pot.
- Rest the dough seam side down, tucking the sides under to tighten it into a firm ball.
- Rest ANY lid on top of the pot. Do not use the Instant Pot locking lid or any object that creates a tight seal – the air needs to escape during the proofing process.
- Select “Yogurt” button, then toggle the "Adjust" button to the "Less" setting. Adjust the display timer to 45 minutes. During this time, yeast dough will double in size.
- Transfer dough out of the pot and, if further proofing is indicated on the recipe, repeat this process from step #1.
Recipe Notes
Equipment
- 6-quart Instant Pot or any size (must have YOGURT setting)
- pastry brush to coat the pot with oil
- parchment paper if not using oil
- lid, plate, or pizza pan
Nutrition facts are estimates and may vary based on brands, ingredients, and portions.


Norma says
My instant pot does not have yogurt setting but has slow cooker and air fry settings. Can I use slow cook setting
Traci says
Thanks for your question! I’ve only tested the dough proofing using the yogurt setting, which is set at a consistent 80°F. I’d be cautious with the slow cooker setting, as it might overheat the dough. If you try it, I recommend using the lowest heat option and checking the temperature frequently to ensure it stays around 80°F. Let me know how it goes if you give it a try! xoxo
Allen says
90 deg is too high for sourdough proofing
Traci says
Hi Allen, thanks for the tip, but I don't proof sourdough in the Instant Pot, as is mentioned at the top of this article. Enjoy!
Linda says
do you have a yeast donut recipe?
Traci says
I don't believe so, but that sounds delicious 🙂
Jeff says
Game changer for bread baking and I love the way you explain this whole process, Kitchen Girl! The bread that results from our Instant Pot proofing is always on point with texture and flavor. Boom!