This post may contain affiliate links. Please read our disclosure policy.
Make this easy graham cracker crust recipe for your favorite baked or no-bake desserts! It's slightly sweet and made for pies, bars, and cheesecakes.

Want to Save This Recipe?
Enter your email & I'll send it to your inbox. Plus, get great new recipes from me every week!
By submitting this form, you consent to receive emails from The Kitchen Girl.
What You’ll Love About This Recipe
Easy graham cracker crust recipes are a dessert essential, and this one is a keeper! This crust works beautifully for pies, cheesecakes, bars, and layered desserts like ice cream cakes.
- Only 4 simple ingredients needed.
- Works seamlessly in pie tins, springform pans, and even larger dishes like 9x13 pans.
- Comes together in minutes with no special skills or tools needed.
- Includes baked crust or no-bake crust options to pair with baked and unbaked desserts.
- Includes storage instructions for the make ahead option.
- Tastes fresher and more flavorful than store-bought crusts.
- Includes customizable options to suit your dessert.
Here is my graham cracker crust prepped and ready for my silky pumpkin cheesecake recipe filling.

Ingredients you’ll need
- Graham cracker crumbs – Store-bought graham cracker crumbs are ultra convenient. Making your own is easy (see recipe card below).
- Brown sugar – Use light for a milder flavor or dark for a deeper, richer taste.
- Butter – Use melted unsalted butter. If using salted butter, skip the extra pinch of salt.
- Salt – Just a pinch to balance the sweetness.

How To Make Graham Cracker Crumbs
Making your own crumbs is simple and budget-friendly. But, don't worry, you can use store-bought graham cracker crumbs to achieve the same, excellent results!
- With a food processor: Add about 12 graham cracker sheets and pulse until fine crumbs form.
- No food processor: Place the crackers in a sealed zipper-top bag, press out the air, and crush with a rolling pin.
- Using a blender: This works too—just pulse until the crackers are finely ground. You may need to turn it off and stir occasionally.
How To Make Graham Cracker Crust
Preheat your oven to 350°F. Mix graham cracker crumbs, brown sugar, melted butter, and salt in a bowl until combined.


Press the mixture into your pie plate or pan using a measuring cup.


Bake for 8 minutes, uncovered, until golden. Let the crust cool completely before filling.

No-Bake Method
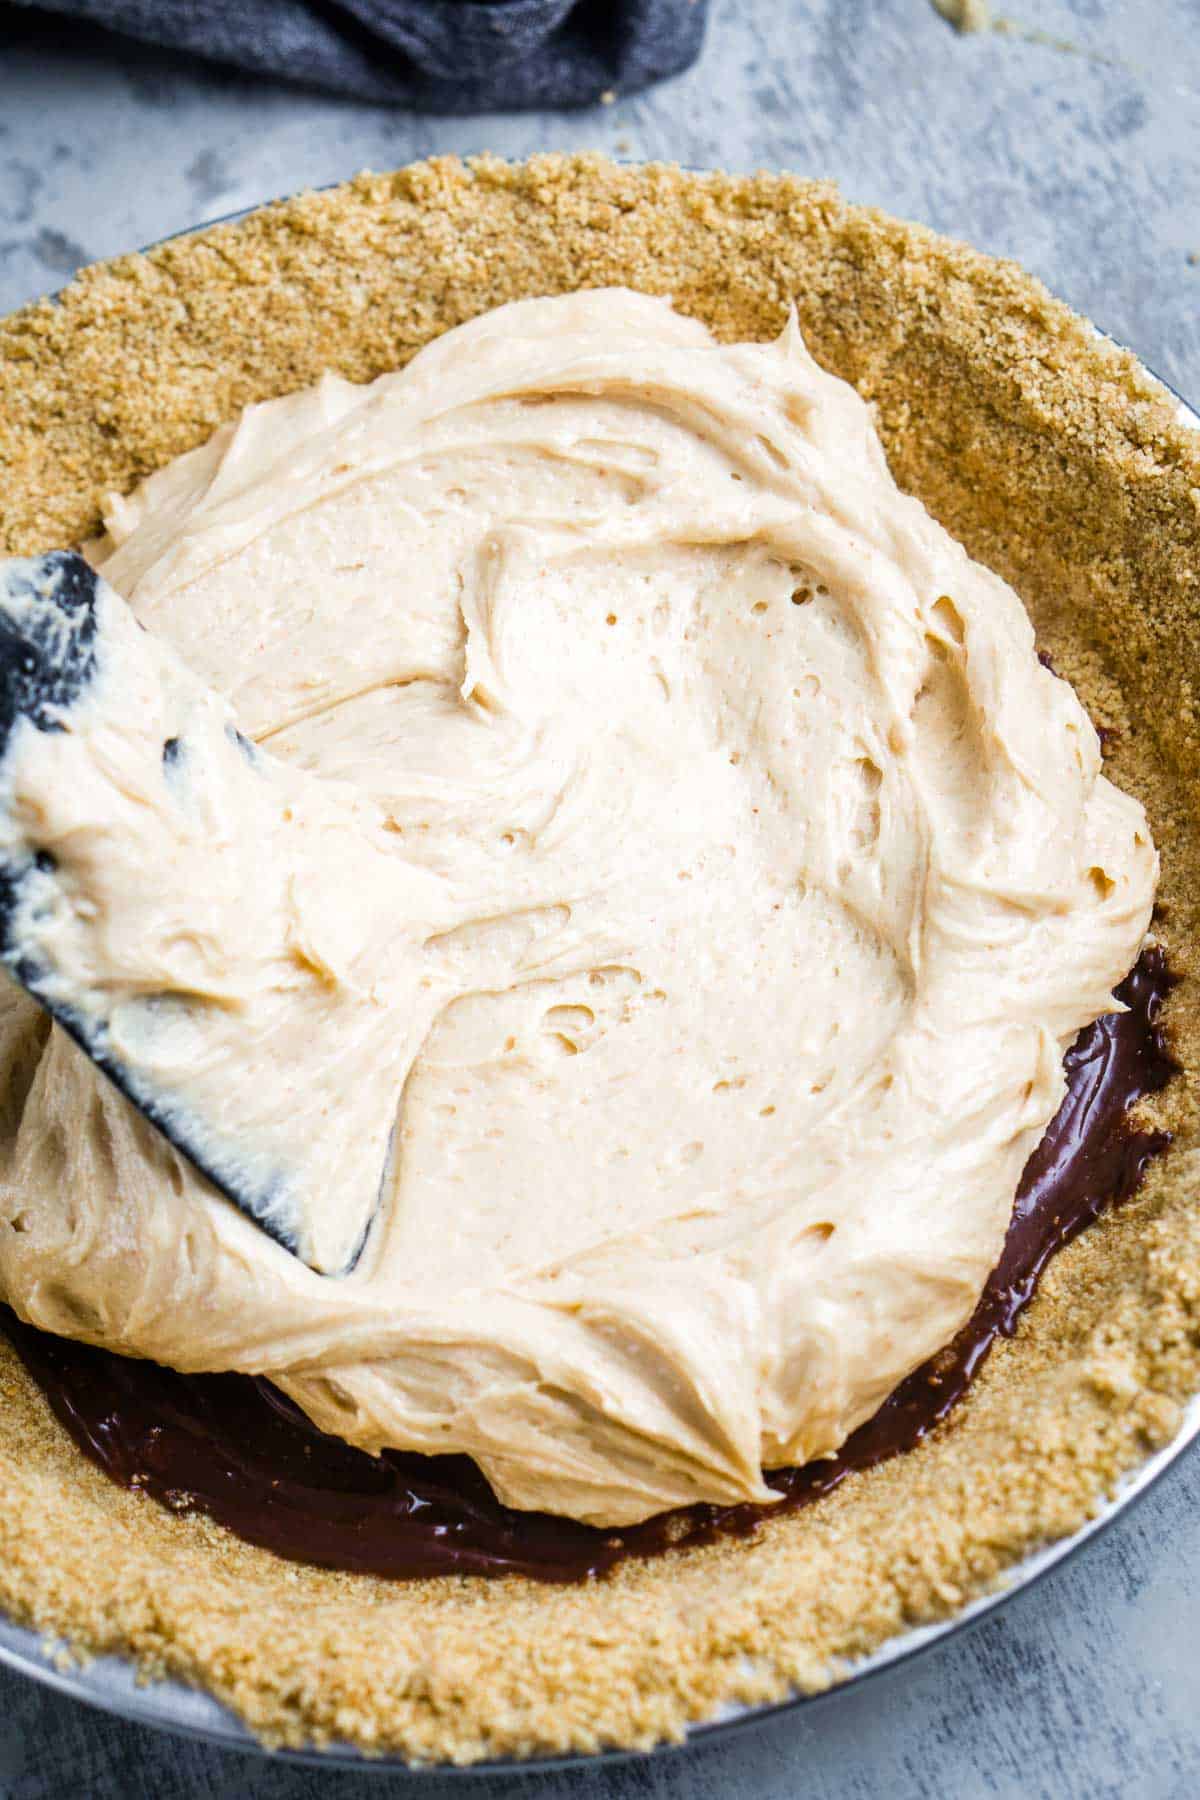
To make a no-bake graham cracker crust, follow the same recipe instructions minus the baking step. Cover the crust and refrigerate for 1-2 hours before adding your filling. Here's a picture of the no-bake crust used for my no-bake peanut butter pie recipe.
Why Use Sugar in Graham Cracker Crust?
Sugar does more than sweeten the crust—it helps it hold its shape. When baked, the sugar melts and combines with the butter, forming a crispy crust that supports your filling perfectly.
Preparation and Assembly Tips
- You won’t need to grease the pan, as the butter in the crust will naturally prevent sticking.
- The crust mixture should feel like slightly damp sand that compresses when squeezed.
- To ensure a compact and sturdy base, press the crumbs firmly into your pan using the bottom of a measuring cup or a flat-bottomed glass.
- Making the crust ahead of time is a great way to save time.
Pan Sizes and Adjustments
This recipe makes enough crust for pie plates measuring 8.5 to 11 inches or a 9-inch springform pan. For larger pans, such as a 9x13 casserole or cake pan, double the recipe to ensure full coverage.
Ingredient Variations
- You can use any flavor of graham crackers, such as honey, cinnamon, or chocolate, to customize the crust to your liking.
- For extra warmth and spice, add ¼ teaspoon of cinnamon or a pinch of nutmeg to the mixture.
- If using salted butter, skip the added pinch of salt to maintain a balanced flavor.
- For a dairy-free option, replace melted butter with coconut oil or olive oil. These solidify when chilled, making them ideal for binding no-bake crusts.
Prepared Crust Storage Tips
- Baked crusts can be covered and stored at room temperature for up to a day.
- No-bake crusts should be refrigerated until you’re ready to use them.
- For long-term storage, you can freeze the crust for up to three months. Wrap it tightly or place it in a freezer-safe container to keep it fresh.
📖 Recipe

Graham Cracker Crust
Want to Save This Recipe?
Enter your email & I'll send it to your inbox. Plus, get great new recipes from me every week!
By submitting this form, you consent to receive emails from The Kitchen Girl.
Note about scaling
When scaling, the light gray ingredient notes after the comma don’t change. Adjust as needed.
Ingredients
Mixture yield: 315 grams = 12 ounces = 2 ½ cups
- 1 ½ cups Graham Cracker Crumbs (193g), approx 13 cracker sheets, blended
- ¼ cup Brown Sugar
- 6 tablespoons Butter, (melted)
- ⅛ teaspoon Salt
Instructions
Baked crust option
- Preheat the oven to 350°F with your oven rack centered.
- Stir the GRAHAM CRACKER CRUMBS, BROWN SUGAR, MELTED BUTTER, and SEA SALT in a mixing bowl until combined.Tip: If using whole graham crackers, pulse them in a food processor or crush them in a plastic bag with a rolling pin until they resemble fine crumbs.
- Transfer the mixture to an ungreased 9-inch pie pan or 9-inch springform pan. An 11-inch pie pan works too!
- Use your fingers to initially press the crust evenly into the edges and sides of the pan. Then, use a flat-bottomed cup to firmly press the bottom of the crust into the pan.
- Bake the pie crust for 8 minutes until the surface is golden brown. Cool completely before adding the filling. Store at room temperature for up to 3 days.
No-bake crust option
- Cover and refrigerate up to 5 days, or until you're ready to use it.
- For long-term storage, you can freeze the crust for up to three months. Wrap it tightly or place it in a freezer-safe container to keep it fresh.
Recipe Notes
Equipment
- food processor optional
- 9-inch pie tin or pie plate or 9-inch springform pan
Nutrition
Nutrition facts are estimates and may vary based on brands, ingredients, and portions.


Comments
No Comments