This post may contain affiliate links. Please read our disclosure policy.
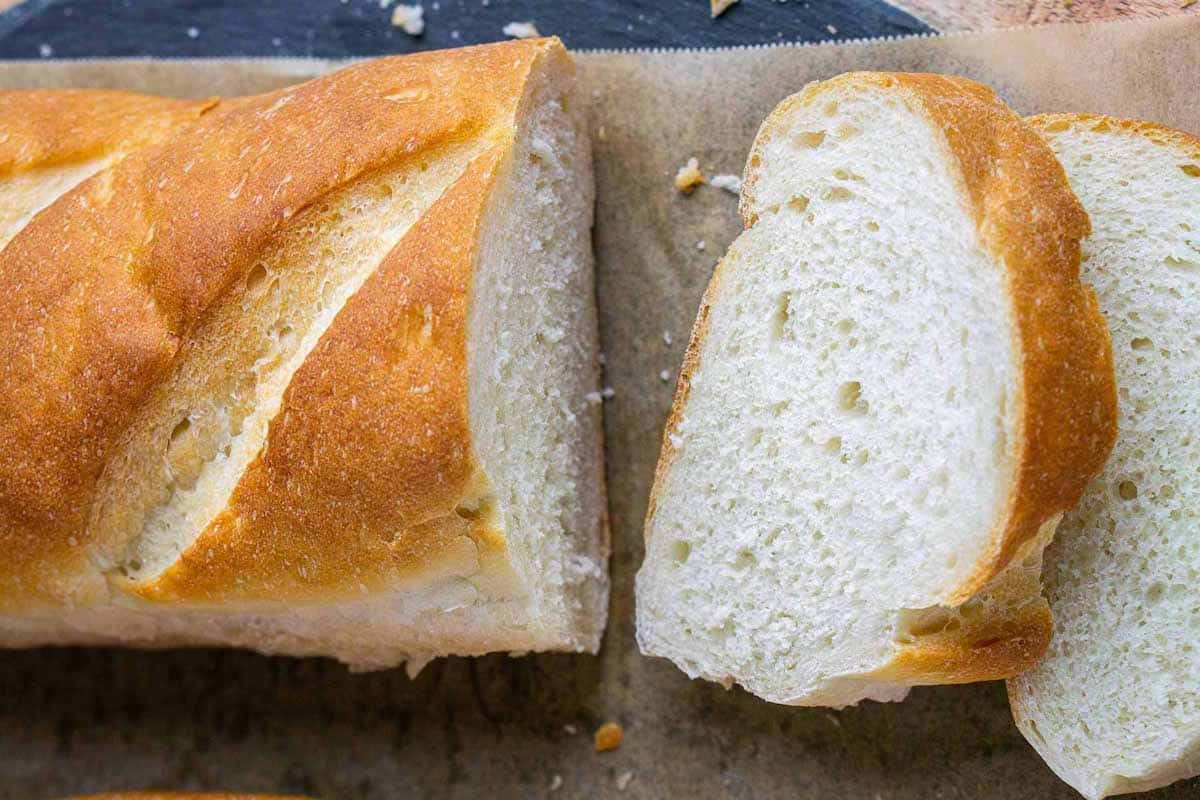
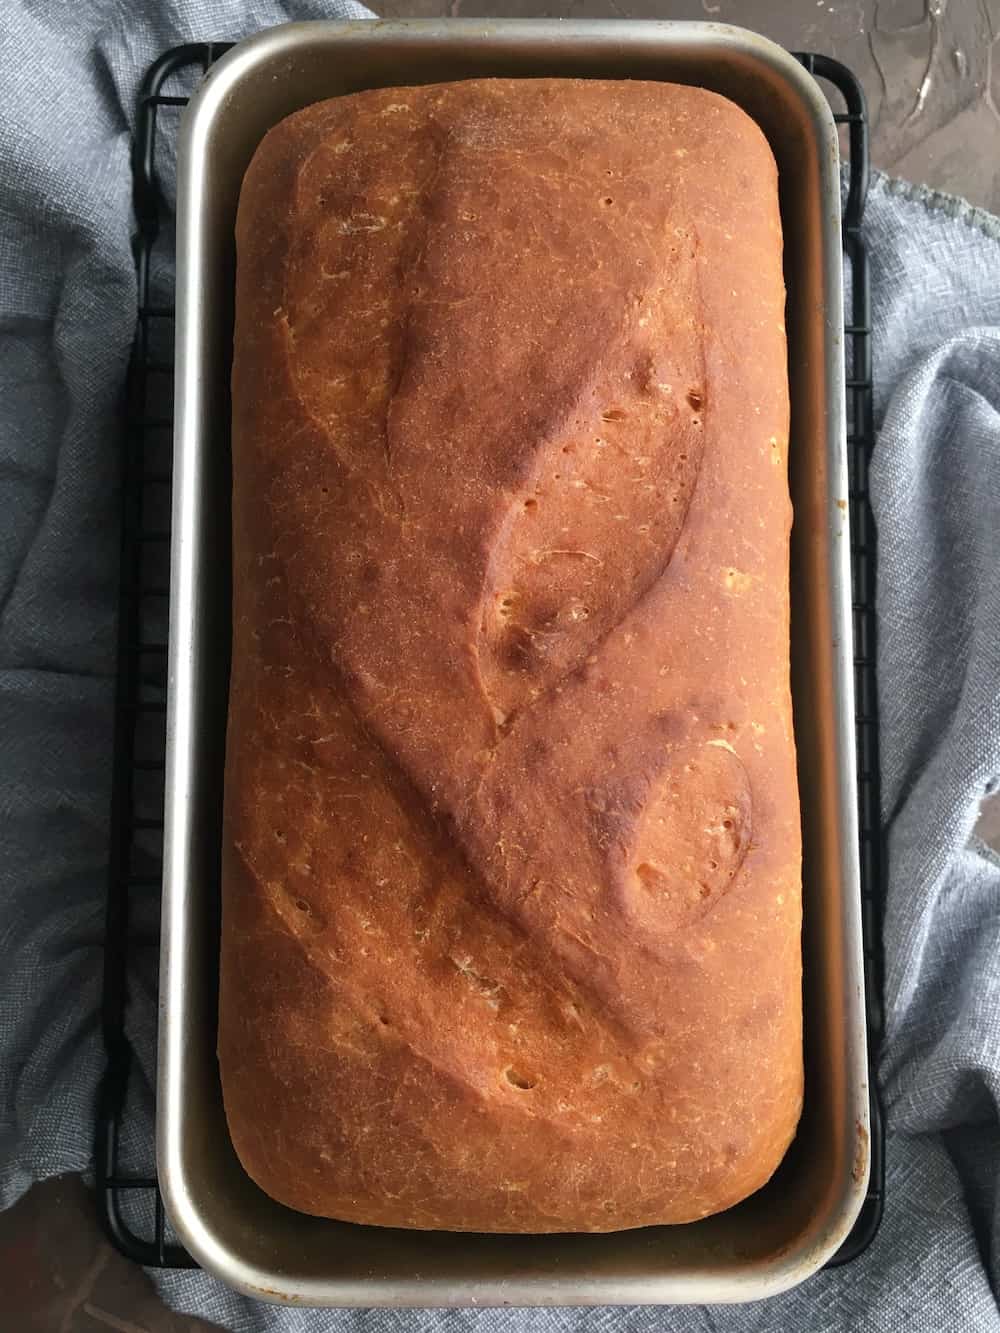
This easy French bread recipe uses only 4 ingredients and makes the best homemade oven-baked loaf. Learn how to make crispy bakery French bread right out of the oven that becomes soft and chewy as it cools.
Try my easy yeast rolls or garlic naan bread recipe next!

Want to Save This Recipe?
Enter your email & I'll send it to your inbox. Plus, get great new recipes from me every week!
By submitting this form, you consent to receive emails from The Kitchen Girl.
What is French bread?
This homemade French bread is made with flour, water, yeast, and salt. It can be mixed by hand or a stand mixer and shaped into your favorite form. Once baked, the crust is golden and crispy. As it cools, it becomes a super soft French loaf for anything.
Why you'll love this recipe
- Easy for any bread-baking level - This simple bread recipe is tried and trusted among bread beginners and skilled bakers.
- You need only four ingredients - Flour, water, yeast, and salt- to make French bread dough. Of course, you also need a tiny amount of oil to prevent the dough from sticking during the proofing phase.
- Two yeast options - This recipe includes instant or active dry yeast instructions.
- Two mixing methods - You can hand-knead the dough or use an electric mixer – both methods are included.
- Economical - The ingredients for this homemade French bread are a fraction of the cost of store-bought bread.
- Enjoyment - Making bread at home is fun and relaxing, especially when your whole house smells like a bakery.
How to make French bread
Here's a brief overview. Visit the printable recipe card below for detailed instructions.
- Combine water and yeast and bloom yeast if needed.
- Add flour and salt.
- Mix and knead the dough.
- 1st proofing - This means allowing the dough to double in size. You can even proof dough in the Instant Pot to accelerate this process.
- Deflate and reshape to prep for 2nd proofing.
- 2nd proofing - This is optional but recommended for gluten development.
- Deflate and shape dough into a baguette, oval, round, or loaf.
- Final proofing - This means allowing the final form to expand before baking.
- Bake the French loaf.
- Cool and store.
Stand mixer bread vs hand kneaded bread
This soft French bread recipe can be easily kneaded by hand or with a stand mixer. Depending on the batch size I want to make, I bounce between both mixing methods. So, I included instructions for both methods in the recipe below.
How to knead French bread in the stand mixer
I use my 5-quart KitchenAid stand mixer for this bread recipe, which yields about 2 pounds of dough. This size is perfect for my 5-quart mixer with the dough hook attachment because it mixes and kneads without any delay. The mixer struggles with smaller batches because the attachment can't reach the ingredients to gather and knead the dough effectively.
To mix dough in a stand mixer, secure the dough hook attachment. Use the lowest speed to mix and knead ingredients into a cohesive, smooth, elastic dough (about 3-5 minutes). Sprinkle reserved flour into the bowl as needed during the mixing process to prevent the dough from sticking to the sides of the bowl. You may also need to stop the mixer and pull the dough back into cohesion with a spatula or your hands.
How to knead French bread by hand
Hand-kneading - Knowing how to knead dough without an electric mixer is good. I usually hand-knead this French bread recipe when I make a half batch (1-pound dough yield) because my hands can incorporate and knead smaller batches more efficiently than the mixer.
To hand knead: Stir ingredients together (using a utensil or your hands) in a large mixing bowl until a shaggy dough forms. Transfer dough to a steady surface and hand-knead until a cohesive, elastic dough forms (about 3-5 minutes). Sprinkle the reserved flour in small amounts to prevent the dough from sticking to the table or your hands during the entire process.
Proofing
You can proof homemade French bread using different methods. Proofing bread in the Instant Pot is my favorite! It creates the ideal environment to proof at a constant temperature of 90 degrees Fahrenheit. It's so convenient because your dough doubles in size in only 45 minutes, even in a chilly or drafty environment.

French bread shapes
Shaping French bread is half the fun! You can shape a baguette, sandwich loaf, oval, or round. A baguette or loaf pan isn't required, but they help maintain shape and height, which is great for bread beginners, especially if your dough texture is loose.
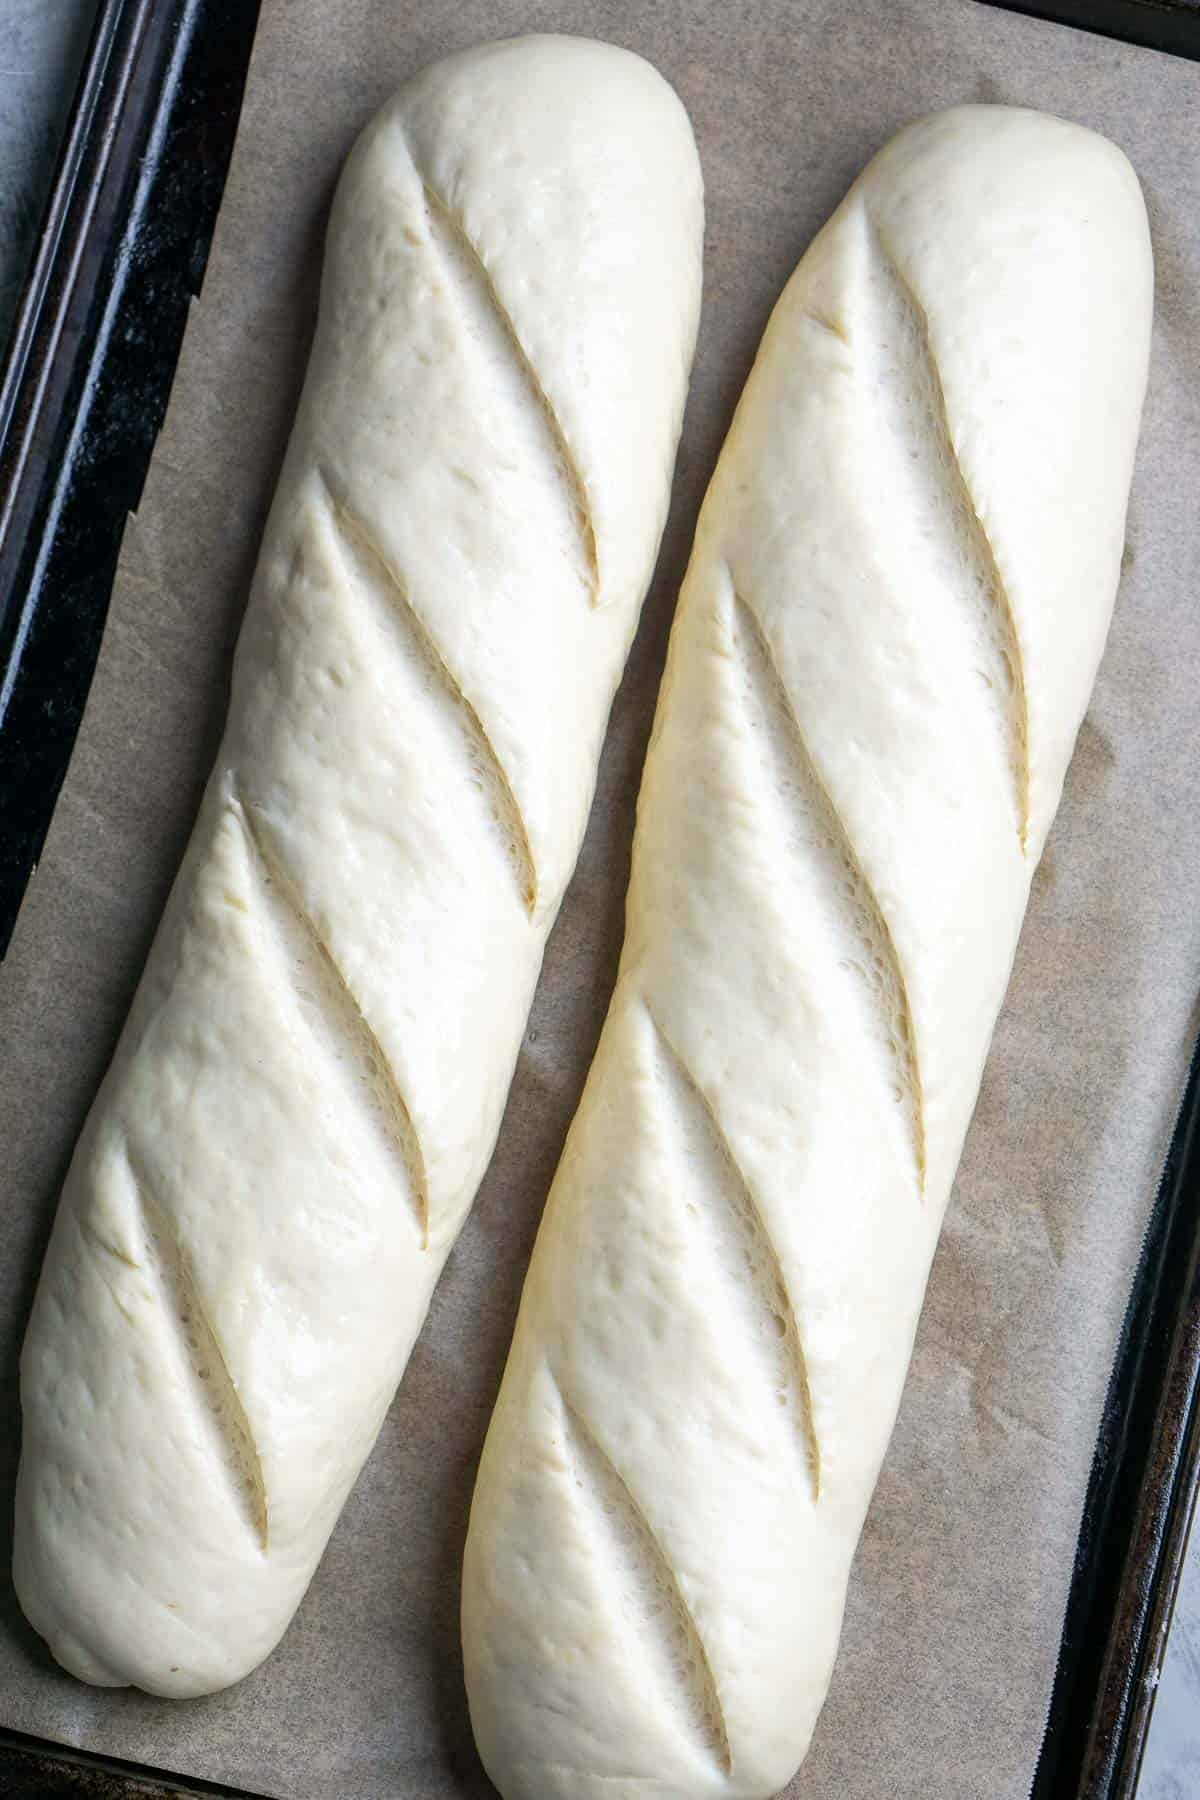
Here are some 'before and after' examples of my French bread shapes.
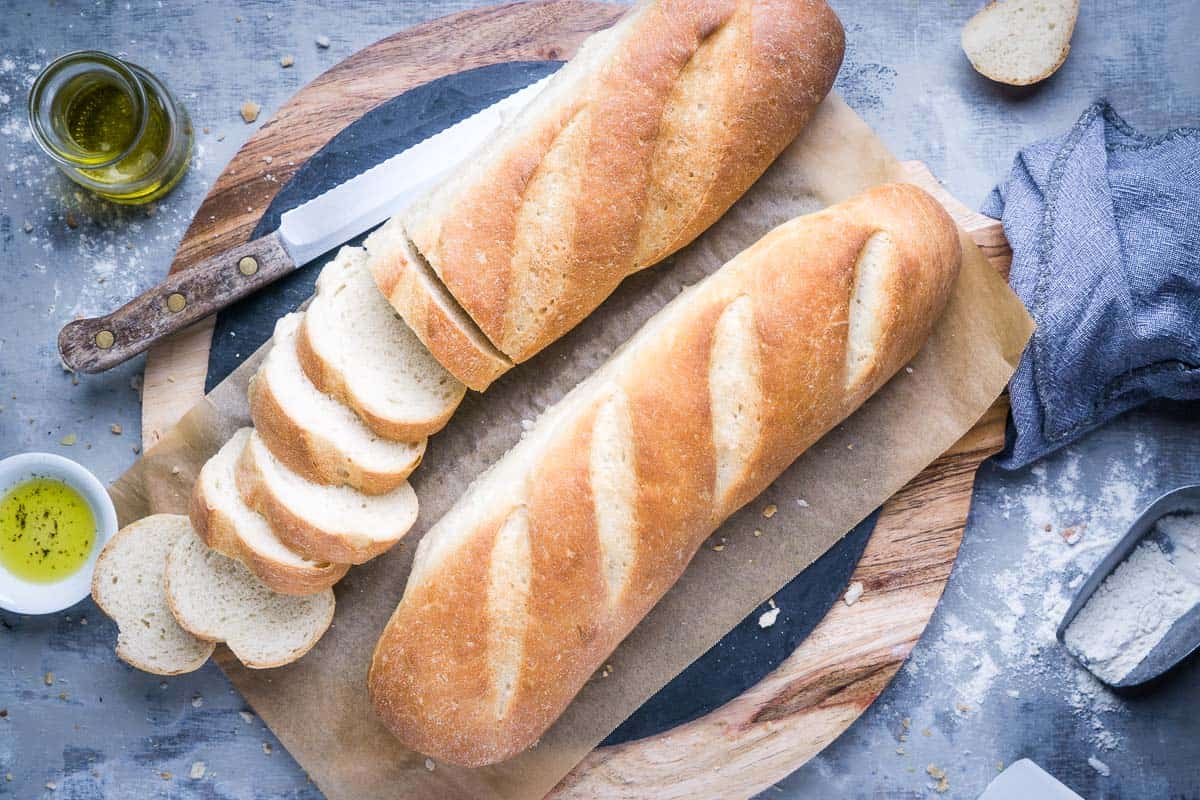
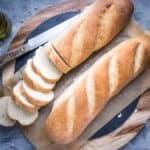
Free-form French Baguettes or long loaves. These long rolls have many uses. French bread also goes with a meat and cheese board.

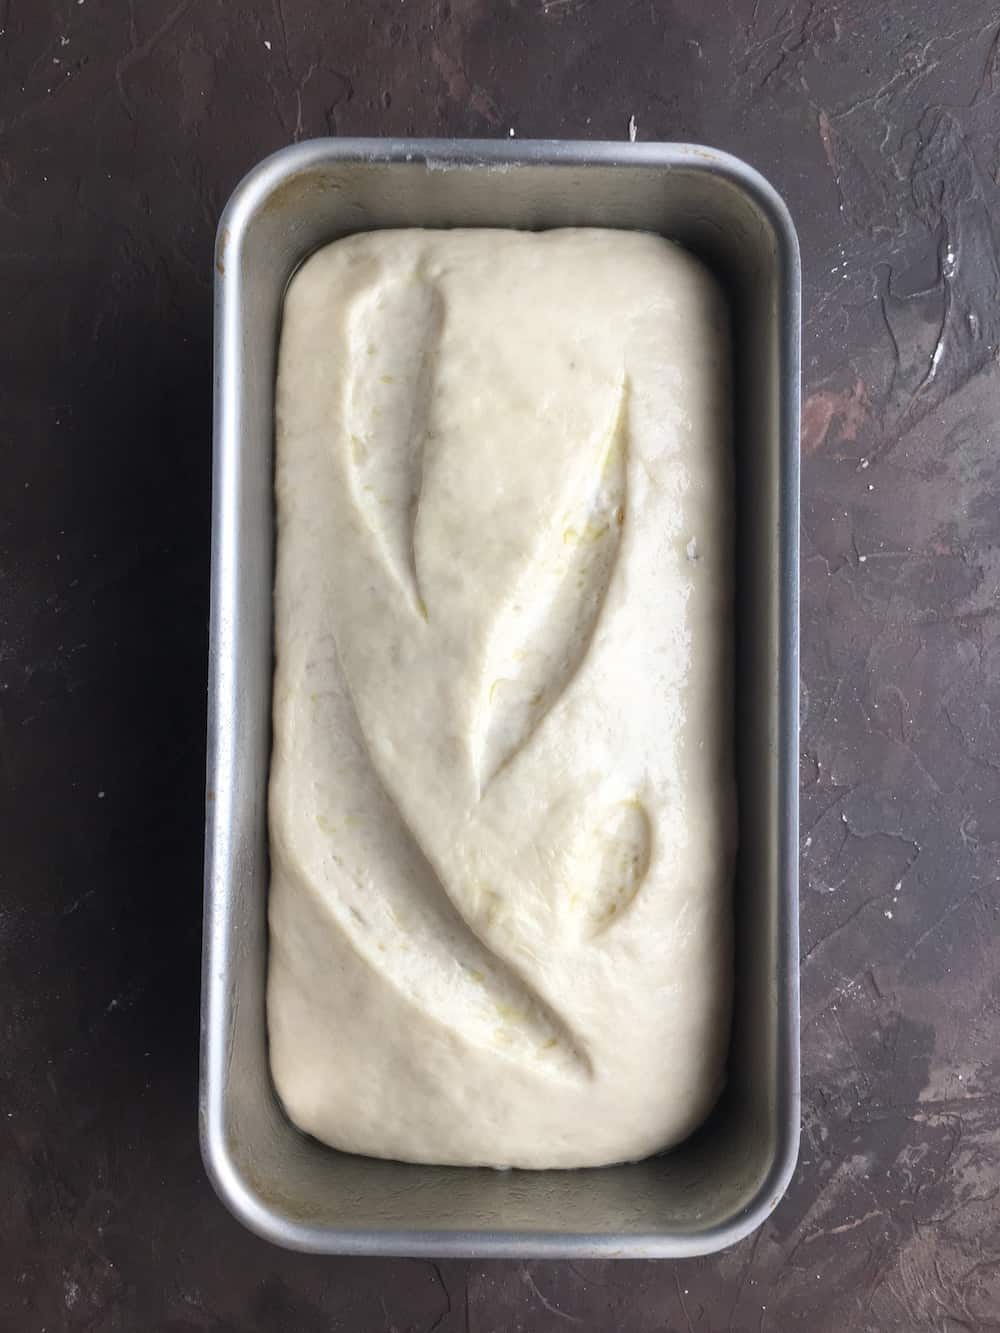
French sandwich loaf in a loaf pan
Free-form oval sandwich loaf on a mini baking sheet


Tools and equipment
These are the bare minimum bread tools needed for this recipe. I've included links to these and additional tools in the recipe card below.
- Mixing bowls - Use these to knead dough by hand and/or proof dough.
- Stand mixer - (Optional) You can also knead French bread by hand.
- Measuring cups and spoons
- Quick-read thermometer - (optional) Gauge water temperature and baked bread temperature.
- Dough whisk - Or any stirring utensil to combine ingredients
- Baking sheet
- Parchment paper - This helps prevent the bread from sticking to the bakeware.
- Bread lame - This scores the dough. A plain razor blade can also be used.
- Oven mitts - Use these for safe handling of hot bread and bakeware.
Looking for the best stand mixer for bread? Check out my feature comparison article and VIDEO: KitchenAid Artisan vs Professional 600 models.

Can you freeze French bread?
Yes! Allow the loaf to cool completely and freeze in an airtight bag or freezer-safe container for up to 30 days. Thaw in the refrigerator overnight or at room temperature for a few hours.
More bread recipes
- How to Make Crostini
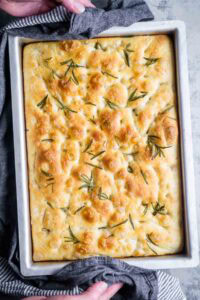
- No-Knead Focaccia Bread
- Homemade Croutons
- Easy Beer Bread
- Cranberry Walnut Bread
- Pull Apart Bread
- Best Bread Stuffing
- How to Dry Out Bread
How to serve French bread
There's nothing better than dinner served with fresh, homemade French bread. Grab any one of these mouthwatering entrees made for Instant Pot or stove!
- Lasagna Soup
- Chicken Pesto Pasta
- Egg Salad Sandwich
- Easy Shakshuka Recipe
- Instant Pot Chicken Alfredo
- Chickpea Kale Soup
- Spinach Lasagna
- Split Pea Soup
- Instant Pot Spaghetti and Meat Sauce
- Sausage Soup
- Minestrone Soup
- White Bean Kale Soup
📖 Recipe
Easy French Bread
Want to Save This Recipe?
Enter your email & I'll send it to your inbox. Plus, get great new recipes from me every week!
By submitting this form, you consent to receive emails from The Kitchen Girl.
Note about scaling
When scaling, the light gray ingredient notes after the comma don’t change. Adjust as needed.
Ingredients
Yields about 1 ½ pounds dough (780 g)
- 1 ⅓ cup Water (315 g), see instructions for temperature
- 1 (¼-ounce packet) Quick Rise Instant Yeast, or 2 ¼ teaspoon Active Dry Yeast
- 1 ½ teaspoon Salt
- 3 ½ cups Unbleached All Purpose Flour (440g), Reserve ½ cup of this (about 60g) to assist mixing
Instructions
- Prep the yeast water: Heat the water per package instructions: 110°F for active dry yeast or 130°F for instant yeast.Stir together YEAST and WARM WATER in a large mixing bowl. Rest for 5 minutes until yeast is foamy and activated (skip if using instant yeast).
- Mix the Dough: Add 3 cups of the FLOUR and SALT to the yeast mixture. Use any utensil to stir the ingredients until a shaggy dough forms.
- Knead the dough: Knead dough by hand (or at low speed in a stand mixer) for about 5 minutes until the dough is stretchy and smooth. Add small amounts of reserved flour to prevent the dough sticking to your hands or table surface.
- Shape and Proof the Dough: On a lightly floured surface, shape the dough into a round, tucking the sides under to form a seam at the bottom. Place the dough in an oiled bowl, seam side down. Cover and let it rise in a warm spot for 45 minutes until it doubles in size.Tip: You can proof the dough in an Instant Pot with the 'yogurt' setting.
- Deflate the Dough: Punch down the dough to remove air bubbles.
- Optional 2nd Proofing: For added texture and flavor, you can proof the dough a second time for another 45 minutes, though this step is optional.
- Shape Loaves: Turn the dough onto a lightly floured surface, press to release air pockets, and divide it into 2 or 3 equal portions.Shape each piece into your desired form (baguette, loaf, or round). Tighten the dough as you shape it.
- Preheat Oven and Prepare for Final Proof: Preheat your oven to 450°F. Transfer the shaped dough to a parchment-lined baking sheet or loaf pan. Cover and let it rest for 30 minutes.If desired, spritz the dough with water and sprinkle seeds like sesame or poppy seeds on top.
- Score and Bake: Score the dough with a razor or bread lame, making ¼-inch slits across each loaf. Bake for 20-25 minutes, rotating halfway for even browning. The bread is ready when golden brown and the internal temperature reaches 190–200°F.
- Cool down: Let the bread rest on a cooling rack for 5 minutes. Then, remove from the pan and cool completely before slicing to retain moisture.
- Storage: Store the cooled bread in a plastic bag or airtight container for up to 2 days at room temperature or 5 days in the refrigerator.
Recipe Notes
Equipment
- mixing bowl or stand mixer bowl
- stirring utensil or stand mixer
- baking sheet or loaf pan or baguette pan
- parchment paper
- bread lame or razor blade to score the dough
- cooling rack optional
- instant-read thermometer optional
- digital scale optional
- dough whisk optional
- bowl scraper optional
Nutrition
Nutrition facts are estimates and may vary based on brands, ingredients, and portions.


Kathie O'Donnell says
Going through a baking addiction thing to relieve stress. Decided to try the French bread recipe. The first time went ok, but the second time the bread was awesome. I am finding that the more you make a recipe the more confident you get in yourself. Today, I'm doubling the recipe and had to be very careful to change the quantities as mentioned in the notes. Cleaning up as one goes is also helpful to prevent the big mess and overloading the dishwasher. Thank you for sharing this simple, tasty recipe.
Traci says
Love this, Kathie! Honored that you picked my recipe for the task. You’re so right that repetition builds confidence, especially with bread, and it sounds like it really clicked for you on round two. So glad it turned out awesome! 🙌 Thank you for sharing!
Renee says
Love this recipe! I can add sourdough to it with out doing anything more than adding another 1/2 cup of flour. It turns out great every time!
Traci says
I love that, Renee! I'm sure others will love hearing that too 🙂 Thank you for making my recipe and for sharing a review. Enjoy!
Maddy K says
Big thanks for the tip about using the Instant Pot to proof the bread. My kitchen tends to run cold and while most recipes state it should only take an hour for dough to double it takes significantly longer for me. Using my Instant Pot to proof the dough was a turning point in my ability to make bread and I use it constantly.
Also - this is my go-to recipe for French bread.
Thanks a million!
Traci says
Awww you are so welcome!! I love that it's your go-to recipe AND that you're proofing it in the Instant Pot. That's been a game changer for me too! I appreciate you taking the time to share this feedback. It means a lot and I'm sure it will be helpful for others ☺️ Thank you!!
Maritsa says
Can you use bread flour instead of unbleached all purpose flour??? I want to make this bread this evening!! Thank you!!!
Traci says
Hi Maritsa, yes, you can make that substitution in equal amounts. The bread may be a little chewier, but it will still turn out great. Hope you love it and let me know if you have further questions. Happy baking! 😊
Erika Nelson says
Is it 3-1/2 cups flour plus 1/2 for mixing, or 3 cups plus 1/2 for mixing?
Traci says
Great question. The recipe uses the total amount of flour listed, with some held back and added gradually during mixing as needed. I’ve updated the wording to make that clearer. Thanks for asking, and I hope you enjoy the recipe 🙂
Linda says
Can you make this recipe and then freeze it before baking?
Traci says
Yes, you can freeze the dough before baking. Here’s what I do: let the dough ball rise once until doubled, punch it down to release the air, shape it, and freeze it right after shaping. When you’re ready to bake, you can thaw it overnight in the fridge or at room temperature. Just make sure it has plenty of time to fully double in size before baking. Let me know if you need timing help!
Rachael says
I'm a amateur home baker and I make great treats of all kinds, but I never have been confident with bread. I made this recipe and it turned out perfect. The best bread I have ever made. As stated in the recipe/comments, the outside was hard out of the oven but softened while cooling. The end result was a beautiful texture inside (looks exactly like the recipe pictures) and a soft chewy outside. I have never heated up the water that high for instant yeast, but maybe that's what I've been doing wrong all these years. Perfect, easy bread. Thank you!
Traci says
Well this makes my day, Rachael! I'm thrilled to know that my recipe was so successful for you, especially because you consider yourself an amateur. Thank you for trusting my recipe and for taking the time to share your experience. Much appreciated! xoxo
Darrell says
I’ve used this recipe many times now and I absolutely love it, sometimes I modify it by adding butter and garlic or butter and honey.
Traci says
I love knowing that it's such a go-to for you! It's truly one of my favorites and I'm glad you discovered it. Thank you for taking the time to let me know. Much appreciated!
Diann Chwalibog says
just pulled from oven, look awesome, waited half hour to cut….amazing🎊
brushed with a dab of butter on top while stlill warm before cutting
will definitely be our go to bread
Traci says
I love hearing this! Brushing it with butter is a perfect finishing touch. So glad it’s a new go-to for you. Happy baking! xoxo
Laura says
This is my first time baking bread. My loaves are cooling right now, but they feel hard as a rock on top, and stayed pretty narrow. They look much more like baguettes than french loaves. I followed the recipe exactly, but feel like there was not enough moisture in the dough. Maybe too much flour? I filled my measuring cups, tapped them, and ran a flat knife over the top. Also, I used all purpose organic flour. I'm hoping they taste better than they look.
Traci says
Thanks for trying my recipe, and congrats on your first time baking bread! The loaves always come out crisp (and they feel hard) from the oven but soften as they cool, so I’d love to hear how they feel once cooled. Shaping takes practice and you can shape French bread into long loaves, baguettes, rounds, or in baking loaf tins. Let me know how they taste—I’m here if you have any questions or need tips! xoxo
Rene E Hatcher says
Hello, this will be my first time making bread. I do not have a thermometer so how long in the microwave would make the water warm for the yeast!
Traci says
Hiya! Water can be heated using a microwave or stovetop and should feel warm to the touch, similar to baby bath water or a warm bottle. Please let me know if you have any more questions. Enjoy!
Moreen says
Made this recipe and the bread came out perfectly and tasted soo good. Notes on water temperature for the yeast to rise where very helpful. Thank you!
Traci says
Yay! I'm so glad you enjoyed my recipe and found my tips helpful. I'm very picky about my yeast water temperature LOL. Thanks for the feedback! I appreciate it!
Jennifer Winter says
Wondering if the two loaves can be cooked separately? very small oven.
Traci says
Yes you can bake them separately, but the second loaf might rise too much while waiting for oven space. So, I recommend cutting the recipe in half and just baking one loaf at a time.
Deborah Evans says
how much instant yeast? I buy it in bulk. in teaspoons please.
Traci says
Hi Deborah, I also buy in bulk so I always add it. The recipe has the teaspoon amount already written in––it's 2 1/4 teaspoons. Let me know if you have any more questions. Thanks and enjoy!!
Gretchen says
Hi This is the absolute best French bread I have ever made. I make a lot of crock pot recipes in the winter time. I serve it with your French bread. Comes out perfect every time. I got some proofing right now for tonight's dinner. Can't wait till it's done. I've made it least a dozen times without fail. Also makes great French bread pizzas! Thank you for the great recipe. Very easy to follow
Gretchen
Traci says
Yayy!!! I'm so glad you're loving this recipe! You're making me want to hop into my kitchen and make some! Thank you so much for taking the time to leave this feedback - and for bringing my recipe into your kitchen. Enjoy!